Every once in awhile you will see a flurry of people making paste paper. Why not? It is inexpensive, a good way to use up old paint and the paper is beautiful. People have been painting on paper this way before there was indoor plumbing.
Every month I meet one morning with a group of local artists. Besides our exchanges we try to do a project every month or so together. One person usually teaches the group and a good time is had by all. This month it was my month at my house so I decided at the suggestion of several people that we would do paste paper. Plus, it is this month's technique for another group I am in. Two birds one stone, Yeah. Now, I know that there are several ways to make this. You can use flour and cornstarch, I have heard of flour and baking soda and salt. All cooked, cooled and paint added. What a mess.
Needless to say, if I am going to spend all that time cooking I want to eat. So I do it a much simpler, immediate, and less messy way. I buy wall paper paste. Ace hardware has powdered paste while the big hardware stores carry the pre measured liquid paste. I used the liquid paste this time. With the powdered paste use two parts paste to one part paint. With the liquid paste we poured it into plastic containers, then added paint. I would use the 2/3 paste to 1/3 paint formula. Just make sure you mix the paint and paste well. We used chop sticks to mix all of the paint.
Next, you will need some containers for the base paint, foam brushes, old credit cards, combs,scissors, string, paper, and grocery store paper bags. We covered our area with freezer paper, cut the paper bags into one long piece and lay in an area that won't get any traffic. This is for you to lay your painted papers on to dry. Each bag will hold about four 8 by 11 sheets of paper.
Paper, we used a sketch book type paper. It is sturdier than copy paper but flexible so you can use the finished paper to wrap end covers for books, etc. Card stock is not real flexible but nice for bookmarks, cards, etc. This is just something you will have to experiment with.
Next, you want to assemble some combs. You can literary use combs and cut some of the teeth out to make a more appealing pattern. Credit card can be notched to make neat patterns. All those fancy scissors can be used to cut patterns onto cardboard or credit cards. Several paint places carry tools for creating patterns in paint for reasonable prices. Check your kitchen you probably have things there you are not using. However, remember that once you use it to put paint on you can't use it with food.
Now to make the paper. Use a foam brush for each color, things will move faster. Lay several sheets of paper down in your work area. Cover them with plain acrylic paint. This will be your base color. I like to use metallic' s for this, it gives a pretty shine. You can just have a plain white background if you like. After the base paint has completely dried take the paint and past mixture and with a foam brush paint a thin layer over the entire piece of paper. Then grab your comb device and start making patterns through the paint paste. Set paper aside to dry.
Some hints - make the paint paste layer thin, it makes a prettier pattern and dries faster.
If you don't like it, use a credit card to smooth the paint paste and start again. Pick contrasting colors. Move fast, don't think to much. Have fun... Try to use up all your paint, throw in trash not down your sink when you are finished.
Saturday, March 28, 2009
Paste Paper Examples
Reddish pink base with purple paint past.
All three of these sheets were pretty much done the same way. I took the comb and held it length wise with the teeth pointing to the left of the paper. Starting on the left side - I was using my right hand - start at the top and make a zig zag motion all the way down to the bottom. Then start agin at the top and go down to the bottom, etc... till the whole sheet is finished. I happen to like this pattern quite a bit. You can make your zig and zag wider or tighter.
Friday, March 27, 2009
Paste Paper - Metallic Examples
I enjoy the look of metallic acrylic paint as a base coat. Be sure to let your base coat thoroughly dry before adding your paint and paste mixture and combing through. The top piece uses a medium comb, the middle piece uses a thick comb, and the bottom sheets are thin tiny combs.
Freebies #24 - Victorian Trading Cards - Birds
This week's freebies are Victorian trading cards. These were used to advertise a business or product that a business carried. Victorian ladies would collect these and make quite elaborate scrap books using these. I have been very fortunate to come across several of these in my flea market and antique store hunts.
These birds are some of my favorites. I love the tobacco one and the birdcage. These have so many possibilities. As "Spring" is just around the corner and everyday seems to bring a new flock to my yard, I thought birds would be this weeks theme. In sorting through my advertising cards I found a slew of cards I had forgotten about. Hopefully in the next couple of weeks I will have them all scanned and I can begin sharing. Till then enjoy these and please share what you do with them.
Wednesday, March 25, 2009
Sorry to be Away for so Long
This has been the week to catch up on everything. Get the pool clean and ready for summer, clean the oven, get the car inspected, oil change, tires rotated, the battery checked, the fluids replaced. Start getting out the warm weather clothes and washing and storing the cold weather coats, jackets and clothes. Take the pets in for their shots and check ups. The list goes on and on...So how has your week been?
Zetti Eggs
These are some of my eggs for the Zetti Egg Swap. They are about the size of an ATC. We were given a template and were asked to make as many as we wanted to swap. Well.... I thought about it and decided to make a dozen. If I didn't want to swap them all I could hang the extras on my little egg tree. Or... maybe I will just make an egg tree for my studio. I got a bit carried away and made more than a dozen. I thought I would share some with ya'll that were finished and dry. Unfortunately glitter does not scan well, but I assure you I used at least two types of glitter on each egg. I had a bunch of different type of Zetti images [some from Teesha Moore and some from old postcards] and a bunch of cardstock and some paper ribbon. I just sat down and spent a few hours decorating. It was so much fun. This would make a really fun one morning or afternoon group project with arty friends.
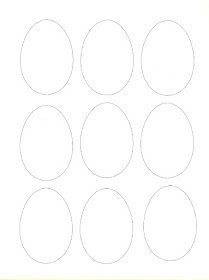
Zetti Egg Template
This is the egg template I used to make my eggs. I printed it on a piece of card stock and then cut the eggs out. Our swap hosts, Tamara, very generously allowed me to share this with you. Please go check out her blog - Magic Molecules - she has some delightful things on there. She is a very talented lady!
In Honor of My Mother's Birthday
Today is my wonderful Mother's birthday. I won't reveal her age as no lady likes that to be public knowledge. I will say I hope I look as good and have as much energy as she does when I am that age. She can run circles around most people I know. She has been the best mother any child could ever hope for. She has been a wonderful example of how to look at the world and the people in it - always positively and with respect. Take the higher road. I have truly been blessed. So Happy Birthday Mother, I love you.
Friday, March 20, 2009
Thursday, March 19, 2009
Freebies #23 - Bookplates
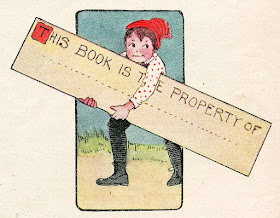
I had a hard time deciding what images to share this week. Then I noticed how busy the local Library has been. From early morning to the early evening the parking lot is jam packed. I am thinking that in these reuse, recycle, repurpose days people have discovered what an oasis the library can be. Losing yourself in a good book is a luxury anyone can afford. I enjoy riding my bike or even a stroll up to the library to get a bag of books to read. With these thoughts in mind I decided to share these 1911 Delinator Magazine bookplates. The children are so charming and the rhymes are really cute. I use the first two and the last quite a bit for my books. Hope you can find a book or two to use them in.
Puzzle Swap
The local altered group met this month on St. Patrick's day. We met and exchanged our puzzles - just one more month till they are finished. One of the gals found them at the Dollar Store. They are 24 peice puzzles and there are 8 of us. So, we each do three connecting pieces. Each of us has a separate theme, wings, birds, breathe-relax, time, etc.
This month we met at my house and one of the girls forgot her puzzle so I was able to scan a bunch of the finished pieces. I have the go ahead to share them with you. I can't wait to put them all together and see how they turn out. What I have seen is amazing so far. I will take pictures and share when they all come together. So here are two different sets, the themes are "wings" and "breathe - relax". I had a hard time with the breathe and relax one till I was told to just do something I liked to do. I love the Geo caching that one of the girls did, her way of relaxing, another did the beach, and I did the Buddha, meditation. I am finding this is a good way to start and end the day.
I am three sets behind - ahh. But I have two intense art days planned for this weekend. It is my catch up and eat chocolate and "do" art time. Don't you love days like that? I am going to put the "wings" puzzle pieces in the next post. Also, thank you Janet, Miranda, and Cathy for letting me share your puzzle pieces.
Puzzle Swap Part Two - Wings
These are four more puzzle pieces. Remember each one of us connected three pieces then altered them. We stripped the original image off leaving the chipboard. Then we applied gesso and in some cases painted over the chipboard. On the back of each piece we numbered the piece and put an arrow showing the direction of the top in marker. We then found a suitable container or reinforced our puzzle box. Everyone wrote the theme on the box and put a sign in sheet with the numbered puzzle pieces in our box. It is each persons responsibility to get the puzzle to their exchange partner each month if you are not going to make our monthly gathering. It has worked out great. So here are the wing themed pieces that are done. Each one is so unique and different. I love the textures and thought that went into each one. Thank you Libby, Janet, Miranda, Andrea, Carolyn.
Tuesday, March 17, 2009
Digital Collage #10 - The Naturalist
Corned Beef and Cabbage
This is a great recipe. I got this from one of my older cookbook's. It is a Pillsbury recipe that came out when slow cookers first came out. It is easy, delicious and you can cook this anytime. I don't want to tell you how long I have been cooking it....it will make it seem too old, serve this with a nice yeasty bread and horseradish sauce, or some yummy brown mustard. The darker beers are nice, if you are into beer, with this.
Corned beef and cabbage ingredients
2 pounds small red potatoes washed
1 1/2 cup baby carrots
1 medium onion, cut into wedges
1 - 2 to 2 1/2 pound corned beef brisket with seasoning packet
2 cups apple juice
water
8 thin wedges of cabbage
Place potatoes, carrots, onion in 5 to 6 1/2 quart slow cooker. Top with corned beef brisket, sprinkle seasoning packet over brisket. Add apple juice and enough water to cover brisket.
Cover and cook on low setting for 10 to 12 hours.
About 40 minutes before serving, remove beef from cooker, place on serving platter and cover to keep warm. I set mine in a warmed oven - turned off. Add cabbage wedges to vegetables and broth in slow cooker. Increase setting to high, cover and cook an additional 30 to 35 minutes or until cabbage is crisp-tender. Serve with warm thick sliced bread.
Horseradish Sauce
1/2 cup sour cream
1/4 cup mayonnaise
2 tablespoons prepared horseradish
2 teaspoons Dijon mustard
In a small bowl combine all the ingredients and mix well. Refrigerate till corned beef is ready.