This technique takes plastic garbage bags and tissue paper, dress pattern paper, and a few images. You will also need a teflon sheet, an iron and ironing board. A well ventilated place is also a good idea.
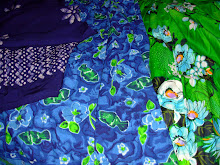
First I assemble a sandwich of plastic bags sticking torn pieces of tissue paper in between. I used white plastic bags from various stores and clear plastic bags that my newspaper arrives in each morning. Place them on the teflon sheet and fold the sheet over so you are only ironing the teflon sheet. Do not iron on ironing board with out teflon sheet. If you do not have a teflon sheet freezer paper can be substituted. Use two sheets of freezer paper. You are making a sandwich - freezer paper/glossy side up or teflon sheet - then plastic bags and tissue - then freezer paper/glossy side down or teflon sheet. Iron away on a hot setting. Let cool. Then pull the teflon or freezer paper off. Everything should have melted together and become one sheet of tissue - plastic paper.
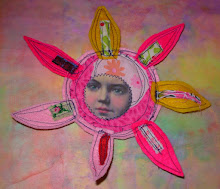
Second step, some images. I cut words and letters from the plastic bags. I also used some once used images on transparencies. I thought transparencies are plastic. They will melt into the bags. I put a layer of more plastic bags, these I cut up, some tissue and the transparency image then covered with a clear bag. Put my teflon sheet or freezer paper over the next sandwich layer and ironed. Melting everything together. I let it all cool. If you don't let it cool sometimes the warm plastic will distort or get small holes in it. Or the plastic letters will do strange things. You can remelt it or put more plastic and tissue on it till you are satisfied.
I played around with thickness and amount of tissue versus plastic. I found I like a tissue bottom and a plastic top. I also found that it runs through my sewing machine really well. I used a regular needle, but my layers were not really dense. I sewed and melted over the thread at times.
The most interesting thing was the the transparency DID NOT MELT. The clear plastic bag melted over it, but did not adhere to the actually transparency. I sewed around the transparency. With the clear plastic bag over it the transparency had a filmy quality that was nice. I took an exacto knife and cut the melted bag off the transparency and revealed the image. I decided with some of the images I was using I needed the detail. The example with the barn I only took part of the plastic off the transparency. I think that one is my favorite.
This technique has loads of possibilities. You could add fabric scraps, ribbon, film negatives, etc.. I like the idea of using up all those horrid plastic bags that just end up in our landfills and making art with them. This is just a few hours of play. I thought about how to use these sheet once I was finished. they are very pliable and could be used as journal covers, cut up in any size for ATC's or skinnies, etc... I have not tried painting on them with acrylics, but that might be cool, then remelting the acrylic into the plastic... Oh so many ideas and not enough time.
I also want to add that I have read several posts on some online art groups about artists using techniques to melt bags together to use in art work. I do not know if this is how they do it but after thinking about it for awhile this just seemed the most logical to me. I have not been able to find any tutorials about this nor did anyone want to share their particular technique.
I would love to see how anyone else does this and share ideas.


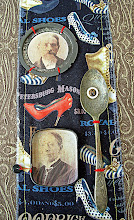
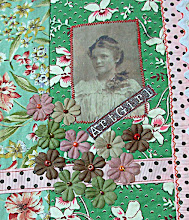
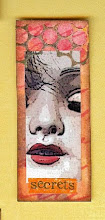
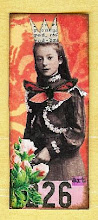
 This little chunky board book is about 3 inches by 3 1/2 inches. I bought 26 of them at a yard sale for $2.00. I have altered quite a few and given away quite a few. This one I decided to use a lot of stamps and scrap paper.