
Bandanna Technique

I thought I would share this technique that the Yahoo Art Technique group will be doing this month. I know I shared this with you when we were doing the Giant Fat Fat Book, but it is always fun to revisit different techniques. I can see a lot of hearts and Valentines using this technique.
The first step is to find the right kind of paper. A heavy weight 140 to 180 lb. smooth watercolor paper works well. I also like Bristol paper when using acrylics. It is a little lighter - 120 lb. but it works just fine.
Paint and Ink
Once you find the paper you like you have several choices to color it with. Watercolors work well. I prefer acrlyics because the color is permanent and do not bleed. Ink can also be used. I only use ink if it is in a mister or spray bottle. Rubbing the paper with an ink pad over a large surface area can ruin your pad. I often have designated pads for such work.
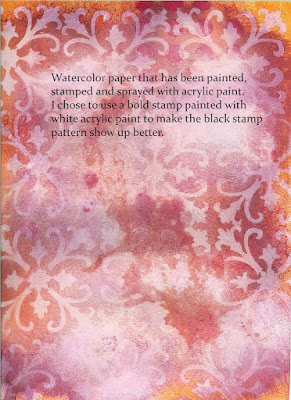
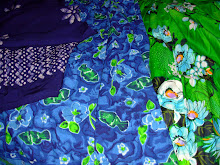
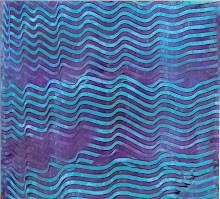
After you have chosen your paper and paint or ink it is time to apply it. Take one color at a time and spray or paint blotches all over your sheet of paper. Let that dry and then try another color and so on. Make sure you let the paper dry between coats. That way the colors do not get muddy.
At this point you need to decided if you are going to cut your sheet of paper into your project size or not to stamp it. If you want a specific size for a stampdesign then it is time to cut the paper up. If you are going to be randomly stamping then leave your sheet whole.
Stamping
After you have chosen your paper and paint or ink it is time to apply it. Take one color at a time and spray or paint blotches all over your sheet of paper. Let that dry and then try another color and so on. Make sure you let the paper dry between coats. That way the colors do not get muddy.
At this point you need to decided if you are going to cut your sheet of paper into your project size or not to stamp it. If you want a specific size for a stampdesign then it is time to cut the paper up. If you are going to be randomly stamping then leave your sheet whole.

Stamping
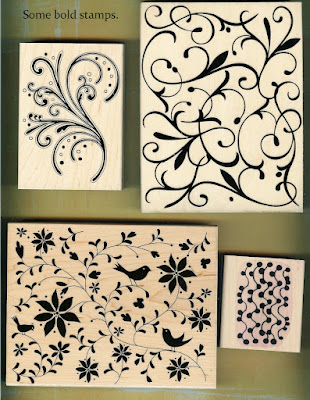
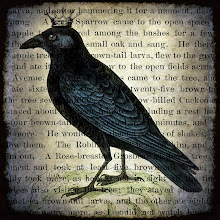
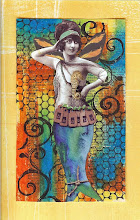
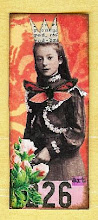
The next step is picking a bold stamp or several bold stamps. I usually have a project size in mind and have cut my paper accordingly. I find a stamp that suits my project and using a black stamp pad - I love Brillance ink and or Stayz on ink - ink your stamp and start stamping your project sheets you have painted. Make sure the ink is dried befor you touch it or cut up your sheet so the ink does not smear.
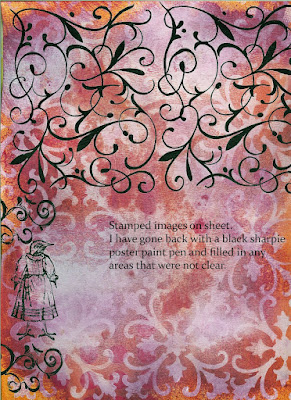
Do not worry if when you stamp your design it is not perfect. By the time you are finished no one will ever be able to tell. I often use a black pen to define the lines or fill in where the stamp did not meet the paper. I have found the extra fine or fine sharpie poster paint pen works wonders with this.

Do not worry if when you stamp your design it is not perfect. By the time you are finished no one will ever be able to tell. I often use a black pen to define the lines or fill in where the stamp did not meet the paper. I have found the extra fine or fine sharpie poster paint pen works wonders with this.

Adding the Extras
For the next step you wil need a good black pen - I use a sharpie fine permanent pen - and a good white pen. There is lots of talk about good white pens. I prefer the Uniball Sigma white and the Sharpie extra fine poster paint pen. You need to experiment with the pens you have and determine what works best for you.
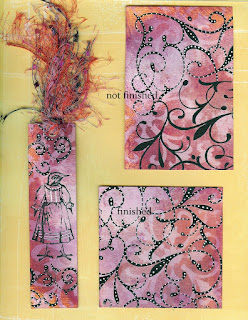
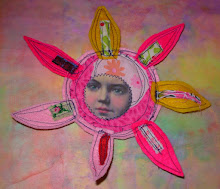
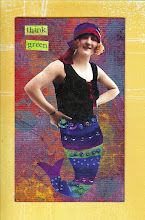
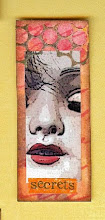
Now that you have your pens, the paper is stamped and the ink is dry ...you are finally ready for the fun part. You are going to highlight the stamped aresa of your project with the white pen. You can use the black pen to add swirls, flourishes, dots, crosshatching, etc. to the design. Let your imagination go wild.
This is a fun project to travel with or to wait with. I keep a bag with stamped paper in my car. I keep the pens in my purse. While waiting at the doctor's, car repair, practice, carpool line etc.. I can be creating. It is easy, fast and they turn out quite lovely. I do a lot of book marks with this technique. I hope you enjoy...
For the next step you wil need a good black pen - I use a sharpie fine permanent pen - and a good white pen. There is lots of talk about good white pens. I prefer the Uniball Sigma white and the Sharpie extra fine poster paint pen. You need to experiment with the pens you have and determine what works best for you.
Now that you have your pens, the paper is stamped and the ink is dry ...you are finally ready for the fun part. You are going to highlight the stamped aresa of your project with the white pen. You can use the black pen to add swirls, flourishes, dots, crosshatching, etc. to the design. Let your imagination go wild.
This is a fun project to travel with or to wait with. I keep a bag with stamped paper in my car. I keep the pens in my purse. While waiting at the doctor's, car repair, practice, carpool line etc.. I can be creating. It is easy, fast and they turn out quite lovely. I do a lot of book marks with this technique. I hope you enjoy...


13 comments:
Elizabeth, I am green as grass and this is SO well explained. Thank you so much!
All that comes to mind is "Wow!"!! This technique is gorgeous, Elizabeth. Thank you so much for sharing. Hugs, Terri xoxo
Thanks so much for sharing this with us.
Fun technique Elizabeth. Thanks for sharing it.
I also love this technique and you did a good job presenting it! What is the name of the Yahoo technique group? A couple of my groups died and I would like to find a new home!
Thanks thanks for clear instructions for a beautiful technique. Lori from Sketchbook
Elizabeth,
Thanks for sharing this technique with us, and explaining it so clearly.
I absolutely loved this tutorial! Thank you for sharing it.
You are very welcome! My pleasure.
What a wonderful idea Elizabeth! I always realise I've forgotten my mag just when I have to wait, this is just the project to slip in my bag! Mx
beautiful! thanks so much for the awesome tutorial!
Thanks for sharing this wonderful technique. I love your finished pieces and your tutorial is great.
This is beautiful - another 'must try' to go on my list. You have some wonderful photos on your Blog :)
Post a Comment