Showing posts with label bandanna technique. Show all posts

Monday, February 1, 2010

Art Journal Pages

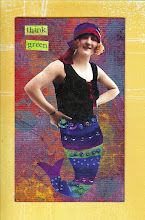
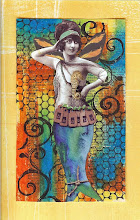
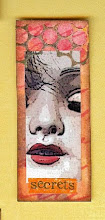
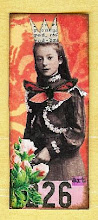
This week flew by and I did not get to work in my art journal as much as I would have liked to. I did work on a tutorial for the Yahoo Art Technique - the Bandanna technique. I have not done this in awhile and it was fun to revisit it. I ended up using this technique in my art journal and making a few bookmarks with it. Fun...

This is the page that I used the bandanna technique with. The lovely fairy girls are from Art Chixs and the hearts were from a free collage sheet that Julia from Cemerony was giving away on her blog. I love this quote from William Wordsworth.


My pre cut letters came in handy when I did this page. I felt like I should use my "word of intent" in my journal before the month was out. My word is Grow. I felt like it could be used in so many ways that were positive. I painted my background with acrylics, then did the transfer of the woman and child with gel medium. I then did the letter border. When all was dry I covered the whole page with watered down black acrylic paint and then wiped it off. I then used fine sandpaper and sanded the pages. I felt like the words really needed some muting. Then I did my quote and some more shading.

Bandanna Technique Tutorial

Bandanna Technique

I thought I would share this technique that the Yahoo Art Technique group will be doing this month. I know I shared this with you when we were doing the Giant Fat Fat Book, but it is always fun to revisit different techniques. I can see a lot of hearts and Valentines using this technique.

Choosing the Paper

The first step is to find the right kind of paper. A heavy weight 140 to 180 lb. smooth watercolor paper works well. I also like Bristol paper when using acrylics. It is a little lighter - 120 lb. but it works just fine.

Paint and Ink

Once you find the paper you like you have several choices to color it with. Watercolors work well. I prefer acrlyics because the color is permanent and do not bleed. Ink can also be used. I only use ink if it is in a mister or spray bottle. Rubbing the paper with an ink pad over a large surface area can ruin your pad. I often have designated pads for such work.

After you have chosen your paper and paint or ink it is time to apply it. Take one color at a time and spray or paint blotches all over your sheet of paper. Let that dry and then try another color and so on. Make sure you let the paper dry between coats. That way the colors do not get muddy.

At this point you need to decided if you are going to cut your sheet of paper into your project size or not to stamp it. If you want a specific size for a stampdesign then it is time to cut the paper up. If you are going to be randomly stamping then leave your sheet whole.


Stamping

The next step is picking a bold stamp or several bold stamps. I usually have a project size in mind and have cut my paper accordingly. I find a stamp that suits my project and using a black stamp pad - I love Brillance ink and or Stayz on ink - ink your stamp and start stamping your project sheets you have painted. Make sure the ink is dried befor you touch it or cut up your sheet so the ink does not smear.


Do not worry if when you stamp your design it is not perfect. By the time you are finished no one will ever be able to tell. I often use a black pen to define the lines or fill in where the stamp did not meet the paper. I have found the extra fine or fine sharpie poster paint pen works wonders with this.


Adding the Extras

For the next step you wil need a good black pen - I use a sharpie fine permanent pen - and a good white pen. There is lots of talk about good white pens. I prefer the Uniball Sigma white and the Sharpie extra fine poster paint pen. You need to experiment with the pens you have and determine what works best for you.

Now that you have your pens, the paper is stamped and the ink is dry ...you are finally ready for the fun part. You are going to highlight the stamped aresa of your project with the white pen. You can use the black pen to add swirls, flourishes, dots, crosshatching, etc. to the design. Let your imagination go wild.

This is a fun project to travel with or to wait with. I keep a bag with stamped paper in my car. I keep the pens in my purse. While waiting at the doctor's, car repair, practice, carpool line etc.. I can be creating. It is easy, fast and they turn out quite lovely. I do a lot of book marks with this technique. I hope you enjoy...


Monday, August 18, 2008

Bandana Tags


These tags I made for a tag swap on one of the Yahoo groups run by "Trish Bee". It is called the Creating Chaos Swap group. A very talented group. Our mission was to take two tags joined together and use the Bandanna technique on them. I used two sizes of tags.

The smaller tags are easier to cover with a large collage style stamp. The larger size tags make you do a little more of your own design work. I used juiced up chalk pads for most of them. The last two I used spray inks on. I just happen to like the green and purple of the chalks. The dye inks are very rich in color. The chalks leave your paper and tags a little heavier. I also like the range of colors in the chalk ink for this project. I think there is more control with the pad than with the spray bottle.

I took the tags and just randomly placed the pads on the tags. I waited in between colors for them to dry as to not contaminate the pads with other colors. With the spray - I set the tags on copy paper inside a shallow box and spray. If your bottles become plugged. Use a pin to press into the nozzle hole gently to unplug the sprayer. Be sure to do this with nozzle hole away from your face - voice of experience talking. The copy paper with the extra sprayed ink can make interesting backgrounds for other projects. I hope my swap person likes her tags.

Monday, June 23, 2008

More Bandana Art

More Bandanna art. I am finding this technique to be additive. So much fun when you have just a short period of time or you are waiting for an appointment. Also very mobile. I did these with the dishwasher repair man here on and off for two days. There are several groups on line doing monthly challenges with this technique. How fun!