

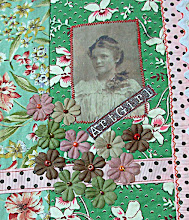
On the Polka Dot I made for Megan I made my own chipboard letters. First I stamped in black on a white piece of paper all my alphabet stamps. Make sure you do this on white paper. When you go to copy the white is not picked up by your copy machine so whatever you are coping on to becomes the background paper for your letters. Then I glued the whole sheet on to a piece of chipboard. Then I cut each letter out and sanded around the edges. I keep all my letters in a little cigar box. This is a great project to do when you are feeling like you want to make something but what? It is time invested in the future.
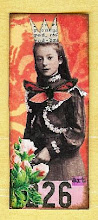
For Megan's piece I pulled out the letters I wanted to use and took a piece of leftover card stock from the project. I taped that on to a regular piece of printing paper. I then laid the letters on the copy surface of my printer. Decided on the size and copied them on to the left over paper.
Next, I took a piece of chipboard and glued the printed letters on to it. Cut them out. Inked the edges and Voila! I have my own custom made letters.


7 comments:
Love this little how to. What a great idea you have here.
Pretty wonderful ... Thanks for sahring!
Best-
Ingrid
Wow, never thought of using the first generation of created chipboard to make another generation. Very resourceful.
And, MY BAAAD... you ARE in my Altered Books yahoo I just joined. In fact, I haven't even intro'd myself yet, so guess what? I'm gonna go do that now and telling everyone you are my Southern Living book muse (you DID get my email yesterday, right?).
hugs,
aimeslee
Great idea, the letters look really cool! I'll have a go at this
Now THIS is a GrEaT idea. Thanks for sharing!
Love this idea , will try and give it a go, thanks
super nifty!
Post a Comment