
Today I was thinking about techniques, books, art, and such. I started looking for some unfinished books I had put together and set aside and ran across some paper bag books. I thought I might share them or at least one right now with you.
These are fun and easy to do. Summer is the perfect time to put one or two of these together. First gather different sizes of paper bags. I use lunch size bags - I think they are number sixes - also smaller bags like a four or two. I just save them when I get them out shopping.
Pick a few colors of neutral acrylic paint. I like Parchment, Light Ivory, and a blue or two. Get a large size bristle brush and a plastic plate or piece of wax paper. Pour a small puddle of paint and dip the tip of your brush in it. Lay out a few bags and lightly paint one side of them. I like the brown of the bag to show through. Let that side dry. Then turn over and paint a different color on the other side. These bags are the pages of your book.
While your bags are drying you can make the cover of your book. I figure out the largest bag folded in half and when measuring add a half inch to the width and length. Cut out two pieces of cardboard and cover with paper bag. Slap a little paint on this. Now comes the hard part.
Take two inch masking tape and lay a piece down on your work surface. Make sure it is several inches longer than your book and the sticky side is up. Now lay the edge of the first piece of covered cardboard on the right side of the masking tape about 1/2 inch in. Then do the same with the second piece. Then fold up masking tape. Cut another piece of tape and cover the inside sticky part. This is the frame for your book.
Once the bags are dry stack them. I have them opening one way then the next bag opening the other way. I put small bags in between the larger bags. Now you are going to sew the bags to the frame or cover piece. lay the cover piece down , opened. Then the pages on top. If you have a sewing machine sew a straight stitch down the middle. I lengthen the size of the stitches a bit. If you don't machine sew you can hand sew. Use a heavier needle and a strong thread like a quilting thread or double strand your thread. Sew a running stitch down to connect all the layers.
Next you will need a piece of hand made paper, something with fibers, like mulberry paper. Cut a piece the length of your book and about a third as wide as your book. Glue this to your spine with the sides overlapping the front and back. now open your book to the center and run some gel medium down your stitches very lightly. Let dry.
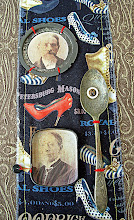
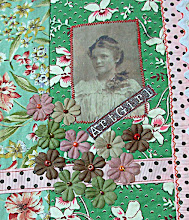
The fun is about to begin. Pull papers and images, tags and fibers and begin to assemble the inside pages. I have made these books with travel themes to the place I am traveling then put pictures and mementos in the bag pockets. You can do a beach book, a nature book, etc... just let your imagination go wild.


















4 comments:
thank you so much! what a wonderful project! this one is a "must do soon"! lol i'm always looking for things i can do with the kids when they visit, and this one is great!
nice book!!
This is absolutely gorgeous! I left you a note on your other paperbag book post. I am trying to make one for my mom's 74th birthday. I love the colors and images you chose!
Lovely and VERY summery!
diana in KY
Post a Comment