Tuesday, February 2, 2010

Happy Ground Hogs Day!


I woke up to "gray" today which means this little ground hog will not be seeing his shadow here in my section of North Carolina. Across most of the south it is cold and rainy. Not cold enough for a repeat of last weekend, but cold enough. We were fortunate where I live not to get any snow. Just rain.

Today I thought I would share a ground hog story with you. The first farm my first husband an I bought had an old equipment type barn on it. This barn through the years had various uses probably because of its location - squank down in the middle of the pasture. The horses used it to stay dry in the rain and warm against the winter winds and snow. The ground hog used it to burrow its nest in the floor.

The first spring as I sat out on our deck watching the horses in the pasture one morning feeling like the world was my oyster I saw sudden movement. It was something large, brown and oh my goodness look at those teeth. I ran inside and got my binoculars, it couldn't be a beaver could it? It was way too far into the pasture away from the woods and stream for a beaver. No it was a groundhog!

That was my first groundhog. Soon I was introduced to a family of groundhogs. All living in the ground in our pasture barn.We eventually had to tear the barn down as the floor was riddled with holes and tunnels from the ground hogs. They actually undermined the whole structure. It was a hazard for the horses. We built other shelter for them and kept them in another pasture closer to their barn in winter. We filled in the holes and tunnels with dirt the spring after we tore it down. Every once in awhile I would catch a glimpse of a ground hog along the edge of the road as I was pulling in or out of our driveway. Never again was our pasture filled with groundhogs.

Monday, February 1, 2010

Collage Obsession Challenge #3

This week the Collage Obsession Challenge gave us two images. The front - an older couple - and the back - advertisement for photographer - of a cabinet card. We could use both images together, just one or separately. I decided to go separate.

The first collage was of the old couple. I sat them in the front yard of an abandoned farm house. I read everyday of people losing their homes, farms not being able to break even. here the couple know their future is in what they have made - their children and grandchildren. Isn't that what the future is all about?

The second collage is really a background piece. I combined several photographs with the back of the cabinet card to make one background piece. I love the old feel it gives to the antique store.


Original Image

February Magazine Freebies

January with all of it's storms has been so cold. I am hoping February will be a little warmer. I love this woman's muff and how she has the flowers on her coat. A reminder that spring is not too far away.

I hope all of the letters are Valentines for this lovely lady. She is so pretty.

I love the graphics on this one. The flowers and her profile against them are fabulous.
I hope he has remembered to send his Valentines out early!

She looks so elegant in her large hat and scarf.

Here are February's magazine pages. I love printing these out and using them in my journals. It helps me remember the month I have been writing in when I go back nd look through my journals. The graphics are so great , it makes a beautiful beginning....

Art Journal Pages

This week flew by and I did not get to work in my art journal as much as I would have liked to. I did work on a tutorial for the Yahoo Art Technique - the Bandanna technique. I have not done this in awhile and it was fun to revisit it. I ended up using this technique in my art journal and making a few bookmarks with it. Fun...

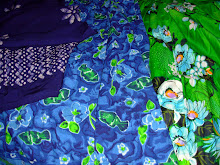
This is the page that I used the bandanna technique with. The lovely fairy girls are from Art Chixs and the hearts were from a free collage sheet that Julia from Cemerony was giving away on her blog. I love this quote from William Wordsworth.


My pre cut letters came in handy when I did this page. I felt like I should use my "word of intent" in my journal before the month was out. My word is Grow. I felt like it could be used in so many ways that were positive. I painted my background with acrylics, then did the transfer of the woman and child with gel medium. I then did the letter border. When all was dry I covered the whole page with watered down black acrylic paint and then wiped it off. I then used fine sandpaper and sanded the pages. I felt like the words really needed some muting. Then I did my quote and some more shading.

Quote - Listen

Bandanna Technique Tutorial

Bandanna Technique

I thought I would share this technique that the Yahoo Art Technique group will be doing this month. I know I shared this with you when we were doing the Giant Fat Fat Book, but it is always fun to revisit different techniques. I can see a lot of hearts and Valentines using this technique.

Choosing the Paper

The first step is to find the right kind of paper. A heavy weight 140 to 180 lb. smooth watercolor paper works well. I also like Bristol paper when using acrylics. It is a little lighter - 120 lb. but it works just fine.

Paint and Ink

Once you find the paper you like you have several choices to color it with. Watercolors work well. I prefer acrlyics because the color is permanent and do not bleed. Ink can also be used. I only use ink if it is in a mister or spray bottle. Rubbing the paper with an ink pad over a large surface area can ruin your pad. I often have designated pads for such work.

After you have chosen your paper and paint or ink it is time to apply it. Take one color at a time and spray or paint blotches all over your sheet of paper. Let that dry and then try another color and so on. Make sure you let the paper dry between coats. That way the colors do not get muddy.

At this point you need to decided if you are going to cut your sheet of paper into your project size or not to stamp it. If you want a specific size for a stampdesign then it is time to cut the paper up. If you are going to be randomly stamping then leave your sheet whole.


Stamping

The next step is picking a bold stamp or several bold stamps. I usually have a project size in mind and have cut my paper accordingly. I find a stamp that suits my project and using a black stamp pad - I love Brillance ink and or Stayz on ink - ink your stamp and start stamping your project sheets you have painted. Make sure the ink is dried befor you touch it or cut up your sheet so the ink does not smear.


Do not worry if when you stamp your design it is not perfect. By the time you are finished no one will ever be able to tell. I often use a black pen to define the lines or fill in where the stamp did not meet the paper. I have found the extra fine or fine sharpie poster paint pen works wonders with this.


Adding the Extras

For the next step you wil need a good black pen - I use a sharpie fine permanent pen - and a good white pen. There is lots of talk about good white pens. I prefer the Uniball Sigma white and the Sharpie extra fine poster paint pen. You need to experiment with the pens you have and determine what works best for you.

Now that you have your pens, the paper is stamped and the ink is dry ...you are finally ready for the fun part. You are going to highlight the stamped aresa of your project with the white pen. You can use the black pen to add swirls, flourishes, dots, crosshatching, etc. to the design. Let your imagination go wild.

This is a fun project to travel with or to wait with. I keep a bag with stamped paper in my car. I keep the pens in my purse. While waiting at the doctor's, car repair, practice, carpool line etc.. I can be creating. It is easy, fast and they turn out quite lovely. I do a lot of book marks with this technique. I hope you enjoy...


Thursday, January 28, 2010

Vintage Cherub Collage Sheets Freebies


Here are two collage sheets I made up this morning. I have been scanning postcards and various valentines the past day or so. I decided to make up some collage sheets in the spirit of the One World One Heart Blog giveaway. Although I am not participating this year I was inspired by all of the beautiful art and gifts others are giving away. I have met so many incredible artists and made so many nice people through my blog. I just wanted to offer these as a little Thank You to everyone. I hope you all will be able to use these in your art work. {I made these to fit a 8 1.2 inch by 11 inch sheet of printer paper}

Monday, January 25, 2010

Collage Obsessions - Abandoned


Today I am trying the Collage Obsession Challenge from Elegia and Itkupilli. The challenge was this mansion and the word prompt Abandoned. The first thing that came to mind was a woman left alone with her child - through divorce or death. So, here the lady of the house is with her child watching as her things are sold, taken away so she can take care of her child. Above her sits her protector or totem wondering how to help. The woman is wondering how to teach her child never to make a commitment he can not keep. How to explain why they were abandoned...

Sunday, January 24, 2010

Some New Journal Pages

This year I have decided to use the larger Moleskin Sketchbook to use as my Art Journal. After working on my Remains of the Day Journals for so long, my fingers were itching to be back in paint. This past week I decided that it was time to start my new journal. I had read on one of the journaling yahoo sights that Millande was doing a series of videos with prompts to start out the year. It sounded as good of place as any to start. These are some of the prompt pages I have completed.

Millande has a prompt and a video for everyday. Some of the videos for the day are two parts, none being longer than nine minutes. I really enjoy her style and painting. Now, I can finally use some of those Twinkling H2O's I have sitting around. Her journal is made of watercolor paper. Mine is not. I decided to just use her word prompts and go from there. She has a wealth of ideas on these videos.
p.s the pages with a border I used Nancy from Crowabout's border sheets.


The prompt here was use a diary or calendar page.

The prompt - include a smile on your page. This Art Journal is going to have a lot of quotes so I figured this was a good place to begin.

The prompt here was to use a checkered border.

The prompt was have a tree someplace on your page. I used my own photograph tranferred on to the page with gel medium.

Here, we were to use a large circle on the journal page. After my first trip to the beach in a few days due to the cold, I finally was inspired.

The first spread was to be an intro into your art journal. I sort of pooped out on this page. I figure I will go back and finish it as the inspiration comes...

Friday, January 22, 2010

Art Creations Friday - Believe


This has been a long couple of days. This week Art Creations Friday gave us not only gave us this sweet little girl image to do something with, but a fabulous background. I decided after all the time I have spent on the phone with my internet carrier I needed a break. A walk was in order. Here is the little girl image out for a walk in her Sunday best with her protector Mr Crow.

Valentine Freebies

This is one of my favorite Valentine's. It reminds me of my boys.

I had to include one with a bird. They are so sweet.

Aren't they just something? Her all shy and him on bended knee.

A little rose fairy for Valentines.


This is so Ellen Hattie Clapsaddle. I love it.

I am so sorry to get these out late this week. Last chick and I had modem and router problems. We are back on line but still having problems with all of our wireless machines, laptops etc... Needless to say it is a lot of needless tension and stress. Hopefully my computer guru will be able to hook us all back up and life will go on....Hope you enjoy these Valentine images.

Wednesday, January 20, 2010

The Three Muses Challenge - Something in the Air


The challenge this week from the The Three Muses is Something in the Air. I had a hard time deciding what I felt like doing till I was awakened this morning by a rant by one of the talk radio people. It was about the loss of nest eggs, how there is much bitterness and distrust in the air, a time of unrest....etc... etc... On top of all of that the last chick here is starting to really stretch his wings. He is ready to take the plunge away from the nest. The skills to survive are being honed, that will be the fifth to leave. I am hoping the angels are keeping them all safe on their life journeys.

So, how are your nest eggs? your chicks? are the angels watching over you and yours?

Tuesday, January 19, 2010

Even More Journal pages - 5 by 5

This journal had much smaller pages. I chose coordinating pages with yellow and green as my themes. The ledger paper I used was yellow and I wanted a garden feel with this journal.

I tried to use images of flowers and spring. I wanted a light airy feel.

More papers, a lattice type printed cardstock, a wedding table number, all remind me of spring.

These pages have a springtime feel with the potting shed image and the green and yellow paper.
It was not hard searching through the scrap box to find everything I needed to stay with this theme. It was particularly nice to watch the pile of scraps get smaller and smaller. I cannot wait to start journaling.

Some More Journal Pages - 6 by 6

I used all sorts of papers, transparencies and images.

This is such a great way to use all those little pieces of things you have been holding onto.

I used a lot of vintage images and images of old things that I like.

Old maps, ledger paper, coupons, parking tickets, anything that appealed to me went in to the pages.

A Chinese take out menu, my own art work, foreign text, anything that evokes a memory is a good way to start in your journal. Often the imagery will be the prompt you need to get started. These are just a few of the pages from the three 6 by 6 journals that I made.

Some Journal Pages - 9 by 6

This is the largest of my journals. It is 9 by 6 inches. This gives you quite a lot of room for photographs, pockets, and inserts.

I tried to leave room for more daily paper and journaling on each spread.

Some of the pages were smaller and I used them almost as if they were for short notes or the image themselves were the page.

Many of the images I used I tried to make relevant to my own life. Like the boat and the number 33. It is a friends and 33 is the slip number.

Here you can sort of get an idea of how thick the journals start out. Much more will be added as the days go by. I hope you will try one. It is definitely worth the effort.

Put Together Journals!


Yes! I have been a busy bee putting together the pages - over 120 - for these five new journals. [480 pages if you count like they do in books] The covers are no longer empty. They are real journals now. The scraps have been flying through my sewing machine. I am taking Mary Ann Moss's Remains of the Day class online and having a blast. This past weekend I took a couple of hours and sewed these five journals together. Whew! Now, I just have to personalize them as I journal through them.

The largest is 9 inches by 6 inches. I really like the amount of space that this size give you. Particularly if you are going to use photographs or have a lot to say! The three middle journals are 6 inches by 6 inches. They feel nice in the hand are easy to throw in a bag to go. The top journal is only 5 inches by 5 inches. The pages are much smaller but I am thinking this will make a great quote and list journal. Only one more to go and I will have the original six covers filled and completed.

Monday, January 18, 2010

Bottles - Cleaning etc,,,


Since I did my last bottle post I have had several questions that were posted or emailed to me. I thought I would answer them in one post. I hope that is okay. If I haven't covered everything please comment or email me.

First - Where do I find them? You don't have to have a river to find them. Most towns and farms have old dump sites. They are going to be away from the town or farm. Usually in an area that is wooded or near woods. This land can't be used the same way farm land or built on like town land. Sometime you can stop at farms and ask where their old dump site is and can you dig there. I often trade photographs I take of the farms for the afternoon of digging. In desert areas they usually dumped the trash far enough not to bring in animals but far enough not to stink to much. Some times asking questions when you see or find bottles will lead you to dump sites.

Second - Once you have them how to clean them? First remove as much surface dirt as you can with a hose. I often just dump them in a large plastic bucket with some Dawn dish soap and let them soak for a day or two. Then rinse, and re soak. Sometimes there are some pretty disgusting things in them so wear heavy duty rubber gloves when you are cleaning them. Next I use a wire brush to clean the inside. If the mouth and neck are small I use a baby bottle brush. If this does not work then rice is cheap and works well.

I use plain old white rice uncooked. Pour into bottle and add a small amount of water, then shake. The agitation usually gets most of the crud out. Dispose of the rice in the garbage. Rice can make birds sick so you do not want to leave this outside. Certain stains and stuff do well with just white vinegar. Just add some vinegar and soak, then shake. When the bottle is looking good I throw them in my dish washer and wash them. Be careful when taking them out, the glass gets hot. Fill the bottles with a small amount of water, add flowers and enjoy.

Quote - Faith


In honor of Martin Luther King Jr. Day I though I would post one of my favorite quotes of his. This man could speak! He truly had such love in his heart for mankind. Something we all should remember this day.