Monday, July 21, 2008

Felted Journal Covers


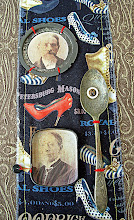
I recently acquired a felting machine. I have been fascinated for some time with the whole concept of felting. The machine gives you a few more options. One of those being that you can use it to fuse fabric to your felted piece. The machine is a lot faster, also.

This is a brand new world for me. I am experimenting with fabric, wool, felt, ribbon, lace, and yarn. Whoa! That is a lot to play around with. Once you sit down and spend some time you just want to try everything.

I started with a sheet of felt that you would do craft or hobbies with. Not a particularly heavy weight piece of felt. It was about the size of a piece of copy paper. I then grabbed a bunch of scraps from my sewing table, fiber bag, and some wool roving. Turned on the machine and began to randomly fill the sheet of felt. Each fabric, ribbon, lace has its own texture and look.
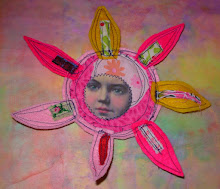
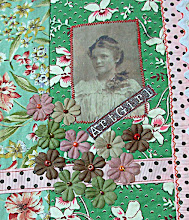
After the sheet was pretty much filled up I grabbed an image of a young woman that was printed on muslin and sewed it on with my sewing machine. I went randomly over the felted piece with my sewing machine to secure or highlight various parts of the sheet.

At this point I was sort of at a loss as what to do with the felted piece. I thought of cutting it up into ATC's or postcards. After a quick glance around my studio I decide maybe a book cover or a fabric book. I had a cheapy notebook I had picked up and it was the right size if I cut the sheet in two pieces. So I cut the sheet in two and used gel medium to glue it to the covers of the plain black notebook. Voila! A new journal and made from scraps except for the image and a paper flower. This really has possibilities.

2 by 2 inch Swap

One of my favorite Yahoo groups - The Gluebots - is having a 2 by 2 inch swap. We make ten and get ten back. No theme. I always make a few extra in case there are some I do not like. With these I was limited in materials as I have been away from home. Sometimes the challenge of limited materials makes the art work you do so much more inventive. I don't know if I met the challenge, but this is what I am sending off today to our hostess. I will say I love this size to work on.

Sunday, July 20, 2008

Quote

Life is our teacher. Life communicates with us all the time and it is a lessen to see how life continuously has led me to the people I need to meet, to the situations I need to experience, and the places I need to be. There has never been any real reason to worry since all individual rivers are already on their way to the ocean, to the Whole. It is not about swimming, it is about relaxing and to float with the river in a basic trust that life already leads toward the sea of consciousness, toward the Whole.
Swami Dhyan Giten

Sailing School


Every morning and every afternoon the sailing school is out in the channel. If you stop and listen the wind carries the sound of excitement and laughter, dreams, an accomplishments.

Saturday, July 19, 2008

Freebies #6


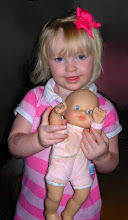
A few little ones for you to use in your personal art work. I think a lot of people have babies on the mind this time of year. Families are getting together to vacation, going to weddings, traveling to see loved ones, or waiting the arrival of a little one. So embrace the little ones in your life! They grow up too fast.

Yellow Quitie Square


This is my July quilt square. It is 6 1/2 by 6 1/2 inches and the theme for this month is Yellow. I am finding that every month it gets easier. I am enjoying not doing traditional quilting. Also, adding the flowers or beading just adds texture and seems to make the square "pop" to me. I hope my partner this month in this trade likes it!

Tuesday, July 15, 2008

Left Behind

Back Ground Paper

A wild piece of background paper for you to use in your art work! I would love to see what you can do with this.

Summertime Paperbag Book


Today I was thinking about techniques, books, art, and such. I started looking for some unfinished books I had put together and set aside and ran across some paper bag books. I thought I might share them or at least one right now with you.


These are fun and easy to do. Summer is the perfect time to put one or two of these together. First gather different sizes of paper bags. I use lunch size bags - I think they are number sixes - also smaller bags like a four or two. I just save them when I get them out shopping.

Pick a few colors of neutral acrylic paint. I like Parchment, Light Ivory, and a blue or two. Get a large size bristle brush and a plastic plate or piece of wax paper. Pour a small puddle of paint and dip the tip of your brush in it. Lay out a few bags and lightly paint one side of them. I like the brown of the bag to show through. Let that side dry. Then turn over and paint a different color on the other side. These bags are the pages of your book.

While your bags are drying you can make the cover of your book. I figure out the largest bag folded in half and when measuring add a half inch to the width and length. Cut out two pieces of cardboard and cover with paper bag. Slap a little paint on this. Now comes the hard part.

Take two inch masking tape and lay a piece down on your work surface. Make sure it is several inches longer than your book and the sticky side is up. Now lay the edge of the first piece of covered cardboard on the right side of the masking tape about 1/2 inch in. Then do the same with the second piece. Then fold up masking tape. Cut another piece of tape and cover the inside sticky part. This is the frame for your book.

Once the bags are dry stack them. I have them opening one way then the next bag opening the other way. I put small bags in between the larger bags. Now you are going to sew the bags to the frame or cover piece. lay the cover piece down , opened. Then the pages on top. If you have a sewing machine sew a straight stitch down the middle. I lengthen the size of the stitches a bit. If you don't machine sew you can hand sew. Use a heavier needle and a strong thread like a quilting thread or double strand your thread. Sew a running stitch down to connect all the layers.

Next you will need a piece of hand made paper, something with fibers, like mulberry paper. Cut a piece the length of your book and about a third as wide as your book. Glue this to your spine with the sides overlapping the front and back. now open your book to the center and run some gel medium down your stitches very lightly. Let dry.

The fun is about to begin. Pull papers and images, tags and fibers and begin to assemble the inside pages. I have made these books with travel themes to the place I am traveling then put pictures and mementos in the bag pockets. You can do a beach book, a nature book, etc... just let your imagination go wild.

Inside of Summertime Paperbag Book


Curried Seafood Chowder or Plain Seafood Chowder

I like this as a make ahead and refrigerate meal for when you are having company. The prep time is short - 20 minutes. This is good served with warm rolls and a fresh tomato salad and a crisp Chardonnay.

1 pound peeled and deveined medium shrimp
2 tbsp butter
1 tbsp. curry powder or you can substitute Old Bay Seasoning
3 cups chicken broth
1 cup half and half
2 83/4 cans cream-style corn
6 red potatoes, peeled and chopped
1 pound grouper, cut into small pieces

1. Melt butter in Dutch oven over medium-high heat. Add seasoning - curry or other. Stir constantly for about a minute. Gradually add the chicken broth, half and half, corn, and potatoes. Bring to a boil, reduce heat and simmer around twenty minutes till potatoes are tender. Now you can refrigerate till mealtime.
2. At meal time pull out soup and heat up. Add shrimp and grouper and cook another five minutes or so till shrimp turns pink and the grouper flakes with a fork.
3. Serve immediately.
serves 10

Wednesday, July 9, 2008

Forgotten Beauty


Snippet Art Dolls


I call these "snippets" because you really only use a bit of fabric. The biggest piece is the back piece. The front is just randomly sewing together the"dress" and sewing on her face. Embellish with buttons or beads before you sew the front and back together.

Lesley Riley calls these "fragment" dolls. Here again you are just using small fragments of left over fabric. When I first saw hers I fell in love. Several years later when I was able to have a sewing room and really started to sew again. I started to accumulate those little snippets of fabric. I am not quite sure why I am unable to throw out a small scrap of fabric, but I can't. No excuse. I have an old wooden "in box" on my sewing desk that I just toss them into. When I accumulate enough I make a doll. These are some of my dolls. Two are around 14 inches tall and two are around eight inches tall. If you look closely the small doll that says "sing" is from the scraps from my quilt square. I made her for a friend today. I hope you will look twice at your scraps and recycle them into another piece of art.

Some "Snippet" Images for You


Waiting

This morning coming back from the beach I went by one of the many marinas on the island. These boats looked so lonely I had to take a picture. They are all waiting for the call that their owners want to play.

Tuesday, July 8, 2008

One piece of Paper


The long weekend was long.....I always feel like I need to clean and start the new week of right. I am not sure why I have this compulsion, but it is there. Sunday night, after all the cordite had cleared and the house was back to normal, I decided to clean up my work space in my studio. So with recycling in mind I decided to make a few quick things with the paper on my worktable.

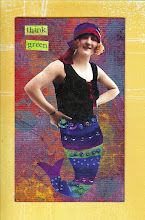
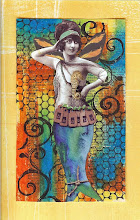
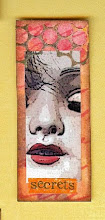
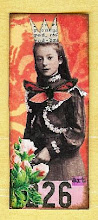
The paper that covers my work area was covered in ink, acrylic, and oil pastels. So a few random snippets of text, and a few images pre-cut that I had also laying around I made four 3 by 5 skinnies and a couple of ATC's. I think orange and turquoise are my new favorite colors. They seem to be showing up a lot in my art work. Have you noticed certain colors showing up in your work?

Arte y Pico Award

Last week I received this awesome award form Toni, a fellow artist from North Carolina. I was and am thrilled. I thought a lot about it over the long fourth of July weekend. This is one of those awards where you have to pick other fellow artists and their blogs that inspire you. Honestly that was hard. Some of the blogs I enjoy have already received the award. Being new to the blog world I am learning that there is more out there than meets the eye. So many blogs...
So here are the rules:

1. Choose 5 blogs that you consider deserving of this award based on creativity, design, interesting material, and overall contribution to the blogger community, regardless of language.
2. Post the name of the author and a link to his or her blog so everyone can view it.
3. Each award-winner has to show the award and put the name and link to the blog that has given her or him the award.
4. The award-winner and the presenter should post the link of the Arte y Pico blog so everyone will know the origin of this award.
5. Please post these rules!

My five picks are:
1. Belinda
2. Linda
3. Lauren
4. Kelsey
5. Gail

I hope you will enjoy these blogs. In Belinda's you will find the spirit to try anything at least once, in Linda's you will learn about altered books and that the journey is the destination, Lauren will open your eyes to fresh young things, Kelsey will share her wonder and talent, and Gail will inspire you with her southern comfort yet acute sense of a true business women, here we call that Steel Magnolia. So here is a varied taste of blogs for you.

Broken #2

Button Fairy Dollz


In the last couple days I have seen several posts in some of the yahoo groups about button dollz or button faeries. I thought I would post a few of mine. So, here you go... I want to credit a couple of artists and give you a couple of sites to go to if these jazz you.

I first saw these on Belinda Spiwak's blog when she spoke about writing a "how to" article for Art Chix Studios. I believe the originator is a girl from Spain. She has a blog an a Flickr site under the name Nenufar Blanco. I think you will find all three very inspiring.

So grab a few images and your button bag jar and go make some fairies. I think they are really cute to put magnets on the back and use as refrigerator magnets. Or you could use them in your studio on a board there to help display your favorite art work or "to do lists".

Friday, July 4, 2008

Happy Fourth of July

"You have to love a nation that celebrates its independence every July 4, not with a parade of guns, tanks, and soldiers who file by the White House in a show of strength and muscle, but with family picnics, where kids throw Frisbees, the potato salad is iffy, and flies die from happiness. You may think you have overeaten, but it is patriotism.
Erma Bombeck

Freebie #5


Fourth of July always makes me feel like a little girl. Food, family, friends topped off with fireworks at the beach. So here is a family and a couple of little girls for you to use in your art work. Have a wonderful fourth, I hope it brings out the child in you.